 ) is your friend! It transformed the way I do isolations and gives you much more flexibility when creating effective masks. With the possible exception of the Quick Selection Tool in CS3 or above, there isn't anything comparable.
But, the pen tool is a pain to learn and understand properly so I thought I would try and put together a few key points which I found the most helpful whilst using it.
Use P to select the pen tool.
Click once to define your starting point. This will p
 lace a solid grey anchor point.
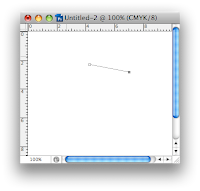
Click once and release to create a straight line between your first click and second click.
The solid anchor point moves to your last click position.
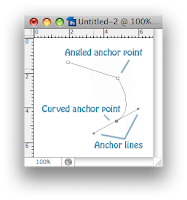
Click and hold to create a curved line. As you hold the mouse button and move the pointer your curve will change shape. You will also see two additional 'anchor lines' which define how the curve is shaped. More on these a bit later. Release th
 e mouse button when the curve is in the correct shape (or close to it).
You can repeat this process, creating an outline of straight or curved lines. When you click back on the original starting point the shape will become closed.
You can edit the shape as you go, or create the outline and then tweak it afterwards.
Moving an anchor point
To move an anchor point, hold down the option (cmd) key and click on an anchor point and drag it.
Changing the shape of a curve
Holding down the option (cmd) key and clicking on the path will select it and reveal the anchor lines.
For simple editing of a curve, hold down the option key and click and hold in the middle of a path. As you drag the mouse the curve will change shape.
For more control, the anchor lines are key to how the curve is formed. They can be moved by holding down the option (cmd) key and clicking on the end of the line (which has a small black dot). If you hold down the mouse button over the end of an anchor line and drag, you will move the anchor line and the curve will change shape.
Creating a corner
Few shapes consist entirely of curves. You will likely need some corners in there. Anchor points can either be an angle or part of a continuous curve.
Whilst initially creating our shape, if you clicked and released, you created a straight line and the anchor point creates an angle. If you clicked and dragged, you created a curved line and the anchor point is part of a continuous curve.
When part of a continuous curve, if you move one anchor line, the other moves in tandem with it to ensure the curve is smooth.
To break this relationship, hold down the ALT key and move one of the anchor lines. It will now move independently of the other line and you can create a corner instead of a curve.
Holding down the option (cmd) key and clicking on a path and dragging it will move that part of the path and alter its curve as you drag
Isolation Tips
- Create your path 1 or 2 pixels inside of the shape you are outlining. This will lower the risk of any stray background pixels creeping into your isolation
- Don't feather more than 1 or 2 pixels
- Don't feel you need to use the pen tool entirely to create your isolation. Use a combination of techniques. For example, never use the pen tool for hair!
- For a quick isolation, a large depth of field is preferable so the outline of your object is entirely in focus. If the focus changes around the outline you will need to selectively blur the edge of your mask to make it look natural
General Path Tips
- As you create your path, Photoshop saves it under a 'work path'. Save your work path by double-clicking it and giving it a name. It will now be saved with your file. Failing to do this will lose all your hard work!
- You can quickly delete a point by pressing the delete key

No comments:
Post a Comment