Chromatic aberration, also commonly referred to as purple fringing, happens a lot. It’s a myth that expensive lenses eliminate the problem although they certainly help reduce it.
It normally occurs in areas of high contrast where you have a bright colour right next to a darker one.
It’s also not always purple: it can be blue, cyan, purple, yellow and it is not always the same colour in one picture.
It is easy to fix and its presence in a photograph can really detract from the image: drawing the eye to where it shouldn't be because of the unnatural colours. Stock photography sites such as iStockPhoto will reject any image with a hint of chromatic aberration so knowing the right techniques and software to cleanly repair the photograph is crucial.
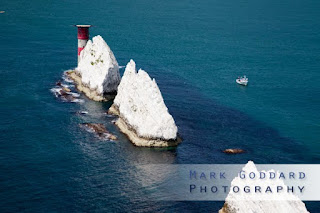
This picture of The Needles off the coast of the Isle of Wight demonstrates it really well.
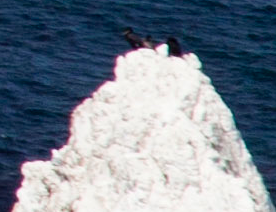
If we zoom in to view the picture at full size, you can see the purple fringing on the left and the blue along the right edge:
There are a myriad of ways to get rid of this through post-processing. I’m a huge fan of non-destructive editing: always preserve the original picture; you never know when you might need it. I have also excluded methods which only deal with chromatic aberration of one colour within a picture or which can impact the rest of the colours in the picture.
Below I’ve detailed the two simplest ways to deal with it that maintain the quality of everything else.
The first method uses Lightroom:
This is what I end up with:
To make more selective edits, you can use Photoshop:
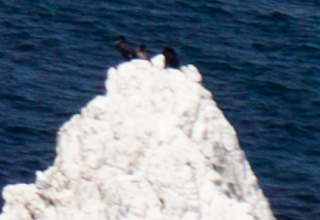
For this picture, I painted blue on the outside and tidied up some of the rocks with a white overlay:

This is what the final result looks like:

It normally occurs in areas of high contrast where you have a bright colour right next to a darker one.
It’s also not always purple: it can be blue, cyan, purple, yellow and it is not always the same colour in one picture.
It is easy to fix and its presence in a photograph can really detract from the image: drawing the eye to where it shouldn't be because of the unnatural colours. Stock photography sites such as iStockPhoto will reject any image with a hint of chromatic aberration so knowing the right techniques and software to cleanly repair the photograph is crucial.
This picture of The Needles off the coast of the Isle of Wight demonstrates it really well.
If we zoom in to view the picture at full size, you can see the purple fringing on the left and the blue along the right edge:

There are a myriad of ways to get rid of this through post-processing. I’m a huge fan of non-destructive editing: always preserve the original picture; you never know when you might need it. I have also excluded methods which only deal with chromatic aberration of one colour within a picture or which can impact the rest of the colours in the picture.
Below I’ve detailed the two simplest ways to deal with it that maintain the quality of everything else.
The first method uses Lightroom:
- Go to the Develop section
- Zoom into your picture to see the chromatic aberration. If possible, try and get onto the same screen an example of all colours of chromatic aberration
- Scroll the right hand panel down to the “Lens Corrections” section. You’ll see two “Chromatic Aberration” sliders.
- To get rid of purple fringing, I moved the Red/Cyan slider to the right. Don’t move it too far or you’ll make it worse
- To get rid of the blue fringing I moved the Blue/Yellow slider slightly right
- If you have other colours, experiment with moving the sliders left or right.

This is what I end up with:

To make more selective edits, you can use Photoshop:
- Add a new layer
- Set the layer mode to ‘Color’. This will enable you to paint over the chromatic aberration with a brush but only change the colour: the saturation and brightness will stay the same
- Select a colour which you want to paint over the chromatic aberration. This should be a colour to the left or right of the fringing itself, or go for white. (Press i to get the colour picker and then click on part of the picture which contains your chosen colour).
- Select the Brush Tool
- Reduce the opacity and flow to 50% each
- Make sure you feather the brush and the brush size is slightly smaller than the width of the chromatic aberration
- Gently paint over the chromatic aberration. You will see it turn to your chosen colour. You may need a couple of strokes
- As everything is being done on a new layer, don’t worry about making mistakes. Just use the eraser to clean up

For this picture, I painted blue on the outside and tidied up some of the rocks with a white overlay:

This is what the final result looks like:

Which method should you use? Lightroom is definitely quicker but you may find it doesn't get rid of everything in which case I'll clear up the worst of it using Lightroom and then Photoshop out the rest of it.

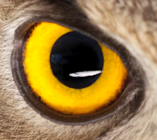
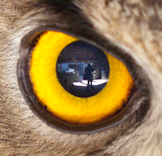 I tried cloning out the reflection of me using Photoshop and whilst it worked to a degree, there was still a lot of clutter in the background, detracting from the picture. I found the best solution was to burn the pupil area. This darkens the pupil, obscuring the unwanted detail, but doesn't make it an unnatural pure black.